

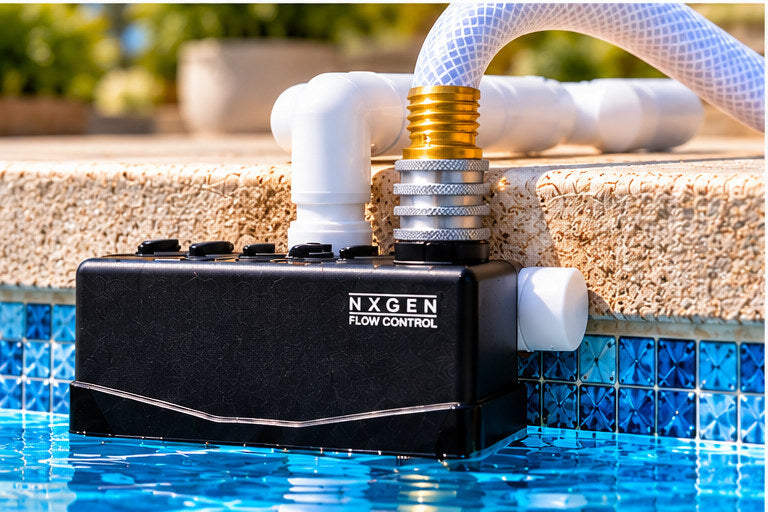
Quick Connect coupling
The locking coupling lets you connect or disconnect the hose-side fitting by sliding the collar. Follow the three connection steps below before turning on the water.
Follow six clear steps to position your Quick Connect model, use the seal correctly, set your water level and confirm automatic operation.
Start setupPrintable Owner Setup Instructions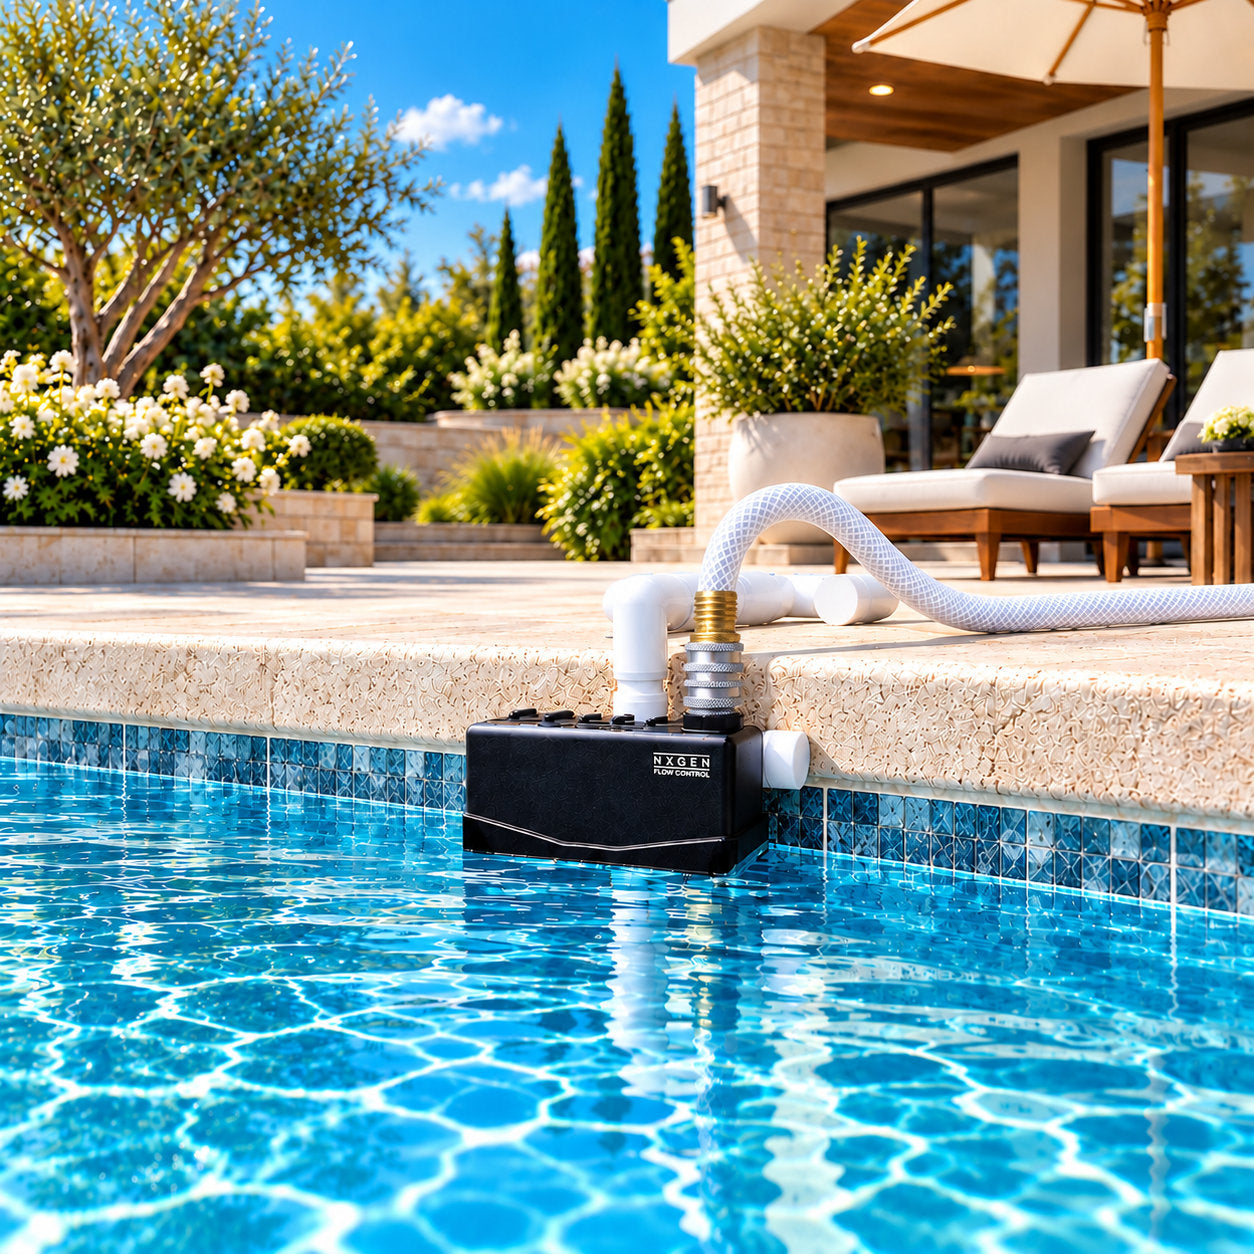
Each component has a purpose. Identify the connection pieces and keep the spare sealing parts for future maintenance.
The locking coupling lets you connect or disconnect the hose-side fitting by sliding the collar. Follow the three connection steps below before turning on the water.

A spare Quick Connect seal and hose gasket are included for your convenience.
Rotate the rear legs to support the white frame securely on your pool coping. Compare the four configurations and select the arrangement that fits your deck.
 Flat - legs folded back
 Flat - legs folded forward
 Tapered coping
 Raised-edge coping
Set the white frame on coping; keep the pipe upright and black assembly freely hanging in pool water.
Hold the white frame steady. Gently twist or rock the black float assembly as you slide it up or down the white vertical pipe.
Set the bottom edge of the black assembly near the center of your skimmer opening, then fine-tune for your desired waterline. Float-height adjustment range: approximately 4–9 inches.
The rear legs are adjusted separately to fit the pool coping. No tools are needed for float-height adjustment.

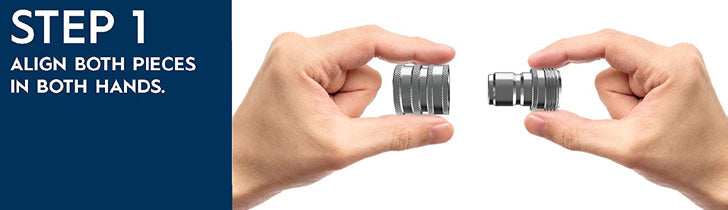
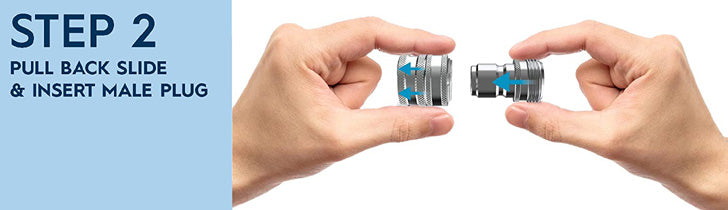
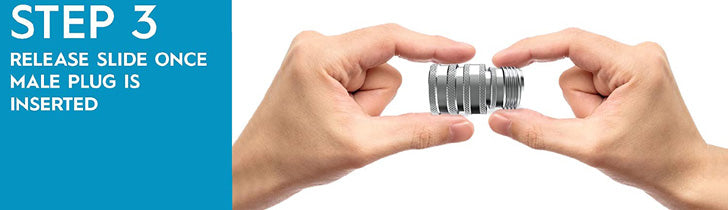
With the faucet OFF, check the EPDM seal and hand-tighten the fitting until snug. Follow the three photographs to lock the coupling. Never use tools or thread tape. Seal and nozzle details appear after Step 6.
Use these three photographs to engage the sliding collar, with the faucet turned off.
Open the faucet only enough to provide no more than a steady stream. High flow is not needed for ongoing pool-level maintenance.
A slower flow may reduce how much water escapes if a hose or connection fails while the system is unattended. It can also make the filling process quieter. Reduced flow does not prevent leaks or replace periodic inspection and shutoff checks.
While water is flowing, gently lift the float inside the black tank assembly. Confirm water stops completely when raised and resumes when the float returns below the selected water level.
Stay present as the waterline reaches the bottom edge of the black assembly. Check for complete automatic shutoff. Stop the supply and investigate if pool level continues rising.
Refer to these original product photographs when inspecting the Quick Connect seal or servicing the hose connection.

When replacing the EPDM seal, its recessed side must be visible from the threaded side of the Quick Connect fitting. Make sure the seal is seated correctly. Hand-tighten the female threaded connection only until snug. Overtightening can crush or distort the EPDM seal/washer and cause leaks. Never use tools.

Do not remove the NXGEN nozzle from the tank assembly. Removing the factory-installed NXGEN nozzle will cause continuous water flow and can overfill the pool. Releasing the Quick Connect collar to remove the hose is not the same as removing the factory-installed nozzle.
Keep the hose flat and out of walking areas. Remove the unit from the pool deck during gatherings to reduce trip hazards. Avoid garden hoses with aluminum end fittings or couplers: contact with the brass or stainless-steel fittings can cause galvanic corrosion and make the connection difficult to remove. Periodically inspect the hose, washer, EPDM seal and Quick Connect coupling. Before freezing temperatures, turn off the faucet, remove the unit from service, and disconnect and drain the unit and hose.
Overfill: Turn off the faucet and check float movement, debris and height setting. No water: Check faucet, hose kinks, inlet and connection. Coupling drips: Inspect EPDM seal, washer and connection; do not overtighten. Continuous refill without rising water: check for pool water loss.
The original retail purchaser is covered by a Limited One-Year Warranty for qualifying defects in materials and workmanship under normal residential use, subject to the complete published warranty terms.
Full Warranty Terms FAQ & Setup Support Contact Staypoollizer
Share your product experience to help other pool owners make a more informed choice.
Review your Quick Connect purchase

To adjust the Staypoollizer water level:
Simple and effective!
If you have purchased any garden hose with ALUMINUM end fittings/couplers, you should be aware there is a condition that occurs between two dissimilar metals known as Galvanic Corrosion.

To ensure a leak-free connection, the male hose fitting face must contact the washer inside the Staypoollizer fitting.
Share your product experience to help other pool owners make a more informed choice.
